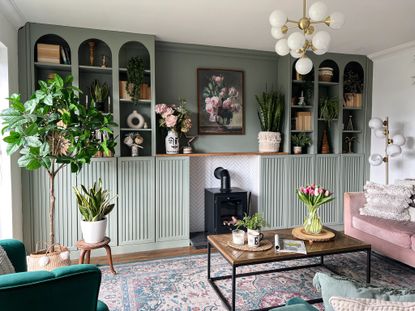
This Art Deco-inspired IKEA hack using BILLY bookcases makes the perfect surround for this fireplace
This stylish sage green IKEA hack brings character to this living room using a few BILLY units, MDF board and some strip wood


Nothing says homely like bespoke built-in shelving across the wall of your living room, and there's no better item of furniture for the job than IKEA's BILLY bookcase. The simple design of this flat-pack essential makes it the perfect foundation for any upcycling project; after all, there's a reason why it's the Swedish brand's most popular piece of furniture to date. And this art-deco inspired DIY bookcase proves why that's the case.
With the help of some MDF, a few pieces of strip wood, and a lick of sage green paint, this IKEA hack brings curved lines to this living room while also maximizing every inch of space with the stylish storage solution. It's all down to the work of home renovator Melanie Boyden who shares her ongoing home improvements over on Instagram. Here, she shares how she transformed her BILLY bookcases into this characterful built-in shelving in just a few simple steps.

Lilith is an expert at following news and trends across the world of interior design. A personal fan of the Scandi-inspired interior, her job entails keeping up with everything there is to know about the Swedish powerhouse IKEA. Paired with her insight into the latest home renovation projects, she regularly shares IKEA hacks with readers to inspire their own DIY projects in home design.
When Melanie Boyden (@melaniejadedesign) and her partner first bought their home in Brighton, UK, they went through a large renovation that completely reconfigured the floorplan of the house. Originally, the living room was an L-shaped open plan living/dining room, but they added a stud wall to create the distinct space where she's built her shelving.
This didn't come without its issues, however. 'The fireplace in the living room was central to the original layout, so it would have to be moved as it was no longer central,' Mel explains. 'We had quotes to move the fireplace but they were extortionate and with our extension quotes increasing as well, we knew we had to come up with a cheaper alternative.'

After seeing some examples of biofuel burners on Instagram, Mel knew this was the answer to her problems as it meant she could have a central fireplace that didn't need a flue or chimney.
'With that idea in place, we got some builders in to quote us how much it would cost to get cabinets built around the fireplace to give us more storage,' she says. 'Again, the quotes that were coming back were eye-watering, so I decided to take the matters into my own hands.' And so, the vision for Mel's IKEA BILLY bookcase hack was born.
'I'd done a few IKEA hacks in the past and had seen many people turn BILLY bookcases into bespoke cabinets,' she notes. She started by buying six 15 3/4 inch wide BILLY units, as well as OXBERG doors to go on the bottom to provide cabinet space, an MDF sheet to cut the arch shapes, trim to go around the edges of the bookcases so they looked built-in, and strip wood to give the doors their ribbed effect. 'I also used an old worktop from our kitchen as a hearth and a large shelf to act as a mantelpiece,' Mel adds.

Once she'd built the BILLY units and fastened them together and safely attached them to the walls, she then began measuring the MDF sheet for the circular arches. Using a jig saw, she cut the sheet to fit the front of the bookcases right up to her ceiling for the built-in effect.
The next part of her living room DIY project involved measuring the recessed panel on the OXBERG doors and using a miter saw to cut all the strip wood for the ribbed effect. She then took measurements for the perimeter of the doors for the trim. Once glued, she used caulk to fill in all the gaps and then fixed skirting boards to the very bottom of the cabinets to hide the bottom of the bookcases.

'Once built, I used Zinsser shellac to prime the bookcases and painted all the bookcases, trim and doors in Valspar Thames Fog,' Mel explains. 'I'd never done anything this big before, so it was quite daunting. The main challenges were teaching cutting the trim around the coving in the ceiling and creating the arches in the MDF - I used a pizza tray to draw a curve and cut it with a jigsaw!'
In total, it took Mel around four weeks to complete the entire shelving, in part because the bookcases needed around three coats of color on top of the primer, so much of that time was spent waiting for her paint to cure.

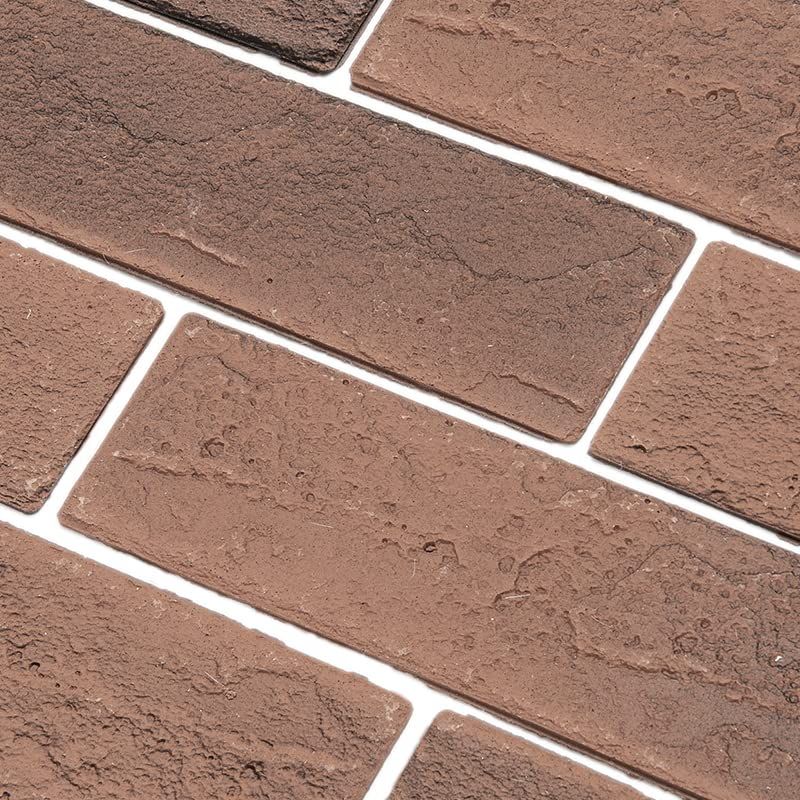
While this project certainly tested Mel's patience and put her DIY skills to the test, the finished result looks right at home in her bright and airy living room. She later added brick slips around the fireplace to give a more authentic and rounded look.
'I love how it makes the room look like a fireplace has always been in that position and the features make it look bespoke and professional,' Mel says. 'It is the color that really finishes it off. I love green and get so many questions and compliments about it.'
In total, the project saved Mel in the region of £11,000 by not using professionals, a real testament to her DIY capabilities. 'I'm extremely proud of my efforts and I'm much more confident when it comes to DIY now,' Mel explains. 'Although I may take on smaller projects from now on...!'
3 key materials

This smoky sage green is a subtle choice to brighten any space, be it your bookshelves or walls. The grey undertones make it subtle enough for a more neutral while still offering a pop of color, or pair it with pretty pastel hues for a more joyous feel, as Mel has done.

There's a reason Zinsser's B-I-N shellac-base primer is an industry favorite. Use their white primer before painting to help make your color pop and prolong its life. The best part? It sticks to any surface without sanding making it perfect for IKEA hacks and furniture painting.

These brick veneers from Amazon are made from mineral powder and poly-acrylic binder, giving them a matte texture finish for a truly authentic look that's perfect for your fire surround, shower walls or flooring. Simply use a trowel to spread the premixed tile adhesive to your surface and press the brick sheets into place.
Be The First To Know
The Livingetc newsletter is your shortcut to the now and the next in home design. Subscribe today to receive a stunning free 200-page book of the best homes from around the world.

Lilith Hudson is the News Editor at Livingetc, and an expert at decoding trends and reporting on them as they happen. Writing news, features, and explainers for our digital platform, she's the go-to person for all the latest micro-trends, interior hacks, and color inspiration you need in your home. Lilith discovered a love for lifestyle journalism during her BA in English and Philosophy at the University of Nottingham where she spent more time writing for her student magazine than she did studying. After graduating, she decided to take things a step further and now holds an MA in Magazine Journalism from City, University of London, with previous experience at the Saturday Times Magazine, Evening Standard, DJ Mag, and The Simple Things Magazine. At weekends you'll find her renovating a tiny one-up, one-down annex next to her Dad's holiday cottage in the Derbyshire dales where she applies all the latest design ideas she's picked up through the week.
-
 These 12 Best Table Lamps for Your Desk — Perfect Glows for a Creative Home Office
The best table lamps for your desk is have a soft, targeted glow. Elevate your WFH set-up with these stylish picks endorsed by Style Editor Brigid Kennedy
By Brigid Kennedy Published
-
 The Nespresso VertuoPlus is 30% Off for President's Day, and it's Kim Kardashian's Coffee Maker of Choice
This sleek and stylish coffee maker was spotted in Kim's home bar, and you can currently save $60 if you buy yours from Amazon
By Lilith Hudson Published

